
Activating USB TOTP token with Office 365 - Self-service
With NFC tokens, the provisioning is done by the IT person equipped with software and hardware that allows burning seeds onto programmable hardware tokens (i.e. an Android device with NFC, iPhone 8 or newer for “-i” models etc.). . However, we have many customers asking if this process can be done by end-users in a fully autonomous manner. The answer is that, in theory, yes - your end-users can burn the NFC tokens themselves as no special admin access is needed. The provisioning needs to be done on behalf of the end-users.However, in most cases the main requirement for this, namely, having an NFC-device to run the NFC burner on, is not met as the main scenario of using hardware tokens is when users have no smartphones at all (otherwise they would have used a mobile authenticator for MFA).
In this context, a solution we can recommend is using one of our USB-programmable tokens that do not require any additional hardware to be provisioned. The guide below shows the process of provisioning a USB-programmable hardware token with Office 365 MFA on behalf of the regular user with no admin privileges. As an example, we will use our single-profile USB-programmable TOTP hardware token, EVVIS-QR1.
The only 2 things needed to provision a USB hardware token are as follows:
- the token itself plugged to a computer running Windows using the USB cable
- the USB Config tool, for this example, EVVIS-QR1 USB Config tool
Before starting the process, launch the USB Config tool, connect the EVVIS-QR1 device via USB and make sure it appears on the device list of the tool
Step 1. Activate MFA option on your Office 365 account
Navigate to your account's security settings page. The direct URL is :
https://mysignins.microsoft.com/security-info
From the Security info page, select "Add Method", and "Authenticator App" from the list.
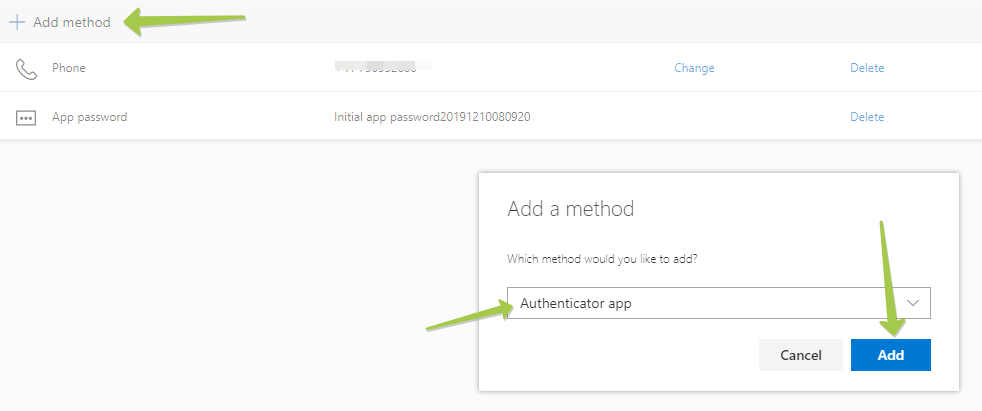
Click "Add" to proceed to the next step. By default, it prompts to use Microsoft Authenticator, which uses a different OTP protocol, which cannot be transferred over to our hardware tokens. Please click on "I want to use a different authenticator app" to generate a TOTP QR code instead.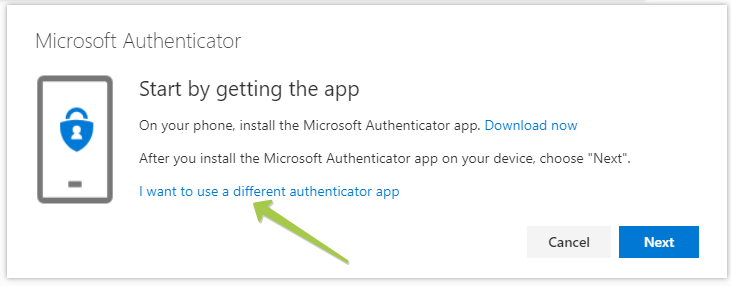
On the next window, click "Next" to get the QR code displayed on the screen.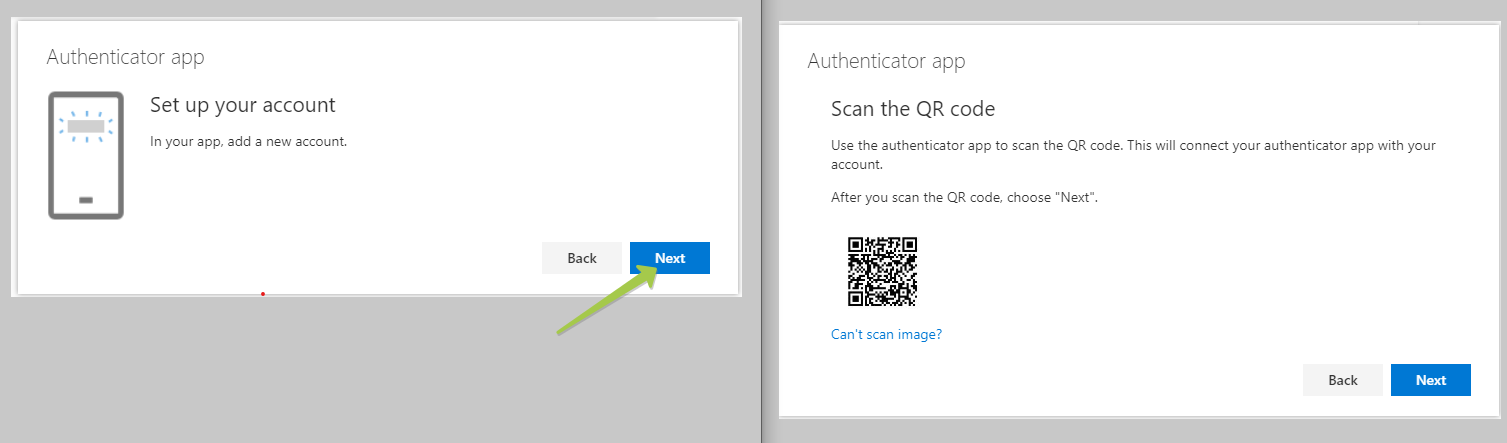
Keep this window open and proceed to Step 2.
Step 2. Provision the hardware token using USB Config tool
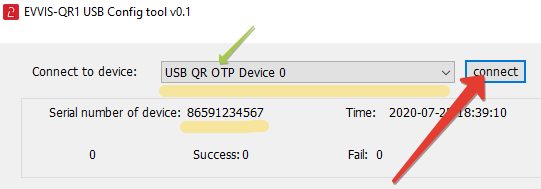
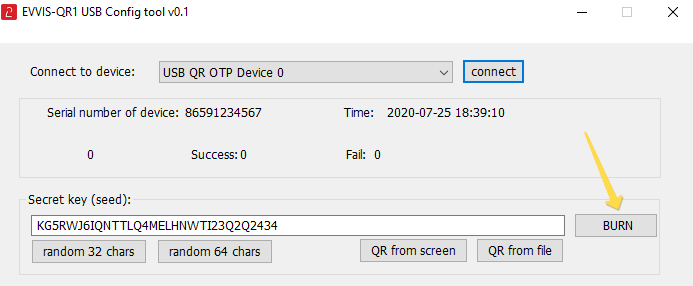
Launch the USB Config tool, connect the EVVIS-QR1 device via USB and make sure it appears on the device list of the tool. Click on "Connect" button and make sure the serial number of the token appears on the screen.
Remember we asked you to keep the browser window with your MFA QR code open? The next step is to read QR from the screen (the app will minimize, take a screenshot and restore again). To read the QR code, click on the "QR from screen" button
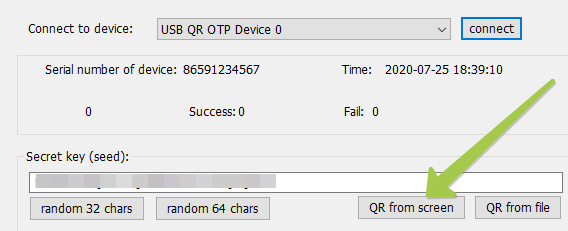
This will populate the "Secret key (seed)" field with the correct value. Now, finalize the token provisioning by clicking on "Burn" button
Step 3. Verify the token and complete the enrollment
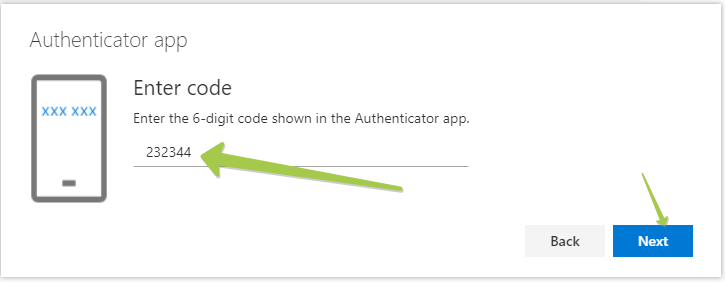
After the burn process is completed, go back to your browser window with the Office 365 MFA configuration page and click Next and proceed with OTP verification. To verify the OTP, click on Next button, and on the next window, enter the OTP code displayed on your token device.
As a summary, the table below shows the advantages and disadvantages of using USB programmable tokens in comparison with NFC programmable tokens.
| EVVIS-QR1 | C301-i | |
| Requirements for provisioning | only a USB cable (supplied) | an NFC-enabled device running NFC burner app |
| Platform for provisioning tool | Windows | Windows, iPhone, Android |
| OTP entry method | Manual, HID (keyboard emulation) QR code |
Manual |
| Dimensions and weight | 74×53×12.9 mm , 40 gr | 49×26×8 mm , 17 gr |
Full comparison is available here
Subscribe to our mailing list
Want to keep up-to-date with the latest Token2 news, projects and events? Join our mailing list!