
Hardware tokens for Stripe Dashboard
 Two-step authentication protects your Stripe account with an additional level of security. When you log in from a new device, Stripe will ask for both your password and a unique code from your hardware token. Even if someone has your password, they will not be able to log into your account without also having access to your token. The default method of Stripe 2FA is using Google Authenticator, which can be easily replaced by Token2 miniOTP-1 hardware token, which will make the login process much more convenient. To opt into Two-Factor Authentication with Token2 miniOTP-1 hardware token, follow the instructions below. Needless to say, you have to have your miniOTP-1 token and Android device with NFC ready.
We recommend using 2 different devices for this process: i.e. a web browser for the enrollment itself plus an Android device (with NFC support) for burning the token using Token2 Burner App. This Android device and the burner app is only needed for the enrollment process. Subsequent logins will only require the miniOTP-1 token
- Install Token2 Burner App and make sure your token is accessible via NFC.
- On your Android device, install and test the Token2 Burner app. You can test NFC access by "get OTP" button of the app: push the button on the miniOTP-1 device and hold it close to the NFC antenna of your Android device (usually below the camera on the back). Then on the Burner App, touch "get OTP" button. The OTP shown on the app should match the one displayed on the token.
- Go to your user profile.
- Click Add under the Two-step authentication section.
- Select Add Google Authenticator. A QR code will be shown on the screen.
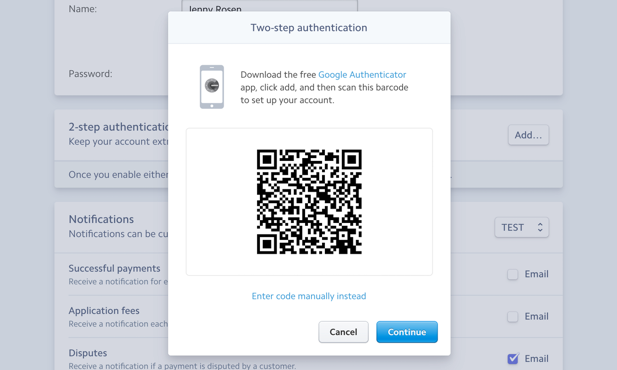
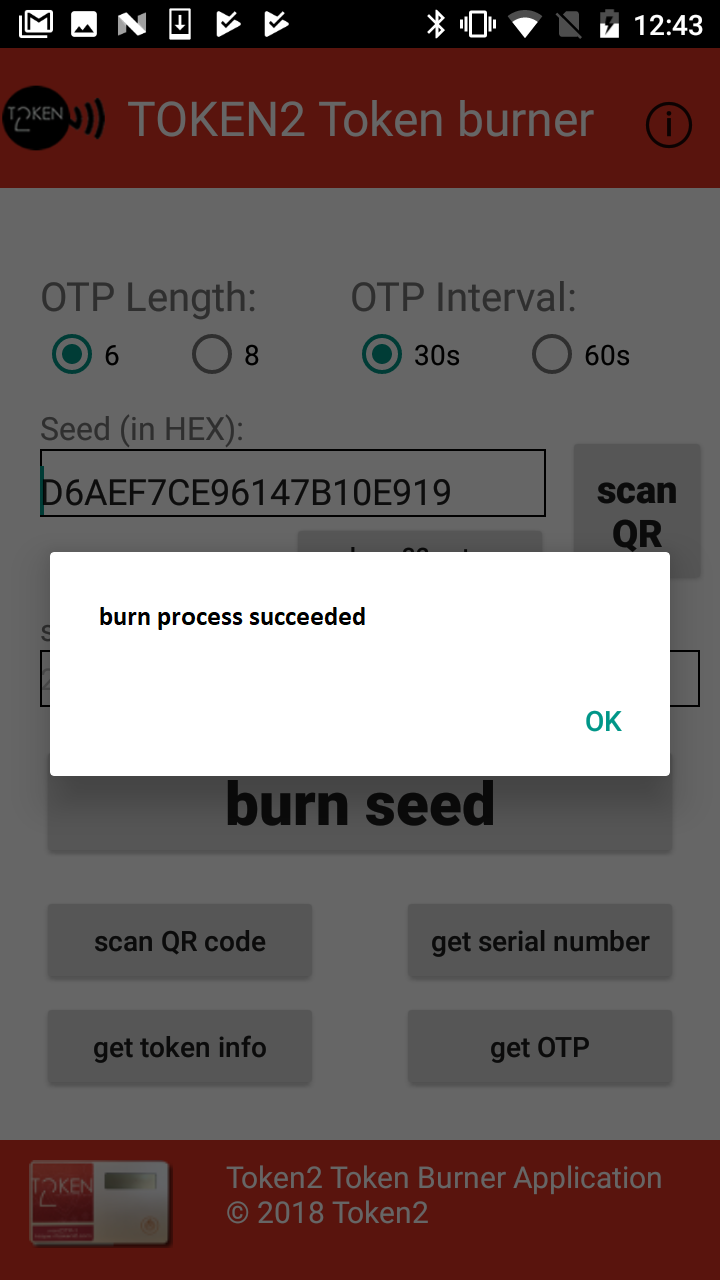
- Launch Token2 Burner App on your Android device. Click on Scan QR button and scan the QR code. Then, push the button on the miniOTP-1 device and hold it close to the NFC antenna of your Android device (usually below the camera on the back). Click on "burn seed" button. The app should show "burn seed process succeeded" message if the process is successfully completed.
- On the Stripe profile page, click next. The page will ask for a 6 digit code ("please enter your 6-digit authentication code...")
- Push the button on the miniOTP-1 device again, and enter the code shown on the screen to the Stripe profile page
- Click "Confirm" to finalize the process
At the end of the setup process, Stripe will display an emergency backup code. This code is only displayed once, so be sure to write it down and store it somewhere safe. If your token is ever lost or stolen, you can use this code to disable two-step authentication on your account. If you lose your code but still have access to your account, you can generate a new emergency backup code from your two-step authentication settings.
Subscribe to our mailing list
Want to keep up-to-date with the latest Token2 news, projects and events? Join our mailing list!