
T2F2 TOTP Authenticator
- Plug the FIDO2 key into a USB port
- Launch the companion app
- Browse thru the existing TOTP profiles and find the one needed to login
- Double-click on the profile badge (this will copy the OTP to the clipboard)
- Go back to the login page that requests the TOTP
- Paste the OTP from the clipboard
- Complete the process by clicking on Submit or by hitting the Enter button
So, seven steps for a relatively simple operation. This may be fine if the login is done once a day, but we can imagine situations where some of the systems require performing these operations quite often - in such a case, this can become a headache.
As an effort to improve this experience (at least when using Windows) we have come up with a new application, called T2F2 TOTP Authenticator.
T2F2 TOTP Authenticator is a modified version of the Companion app, but with several improvements (the full list is given in the last section of this guide), the main one being the "Auto OTP" function.
Auto OTP feature
The idea behind this is simple and is based on using keyboard shortcuts (hotkeys) to send the OTP generated for a particular account to the current input focus. So, this means that when the user needs to enter the OTP, instead of performing the seven steps described earlier, hitting a hotkey (i.e. Ctrl+Alt+Z) is enough.
As a summary, instead of a seven-step procedure, logging in using TOTP Authenticator app will require just three steps (in case the FIDO2 Key is already plugged in, and the app is already running, the process will require only one operation - hitting the hotkeys combination).
Please note that the T2F2 Security keys with TOTP can contain up to 50 TOTP profiles, but only one profile can be used with Auto OTP feature.
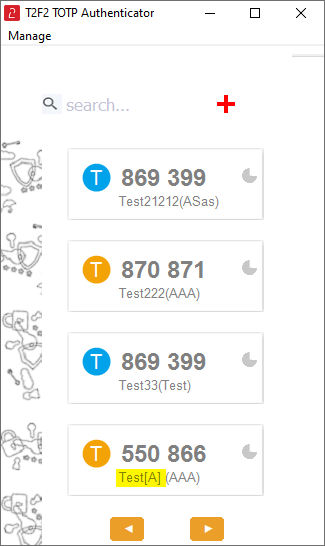
The interface explained
The app looks similar to the companion app, but with only the TOTP feature implemented. As already explained, only one TOTP profile can be used with Auto OTP feature, such profile will have a special tag ([A] string) appended to its issuer value.
Deployment and configuration
Different from the companion app, TOTP Authenticator is a self-contained single-file executable. It can be deployed in a centralized manner. The settings can be also delivered together with the executable (by default, the ini file is created on the first run). The ini file is located under %APPDATA%\T2TOTP.ini (i.e. C:\Users\yourUsername\AppData\Roaming\T2TOTP.ini) and contains only the following values:
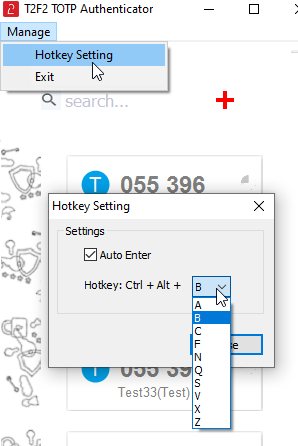
hotKey= 1 ;; the second key of the hotkey combination (Ctrl + Alt + Letter), 0=A,1=B,2=C,3=F,4=N,5=Q,6=S,7=V,8=X,9=Z
autoEnter= 1 ;; defines whether to send the 'Enter' keystroke after OTP (1 or 0, 0 disables the feature)
The same settings can be set via the GUI as well, by going to Manage -> HotKey Setting dialog:
Adding a TOTP Profile
The procedure is similar to the steps explained in the Companion App, with some differences (i.e. we removed the QR scanning functionality to keep the final executable file as small as possible). We will explain below how a TOTP Profile can be provisioned using Office 365 / Azure MFA as an example.
Follow the steps below to add an Office 365 TOTP Profile to your T2F2 second generation security key. Have your key plugged in and the T2F2 TOTP Authenticator app running before starting these steps.
Step 1. Retrieve the TOTP Secret key
Login to your Office 365 account and navigate to security settings page: https://mysignins.microsoft.com/security-info
From the Security info page, select "Add Method", and "Authenticator App" from the list.
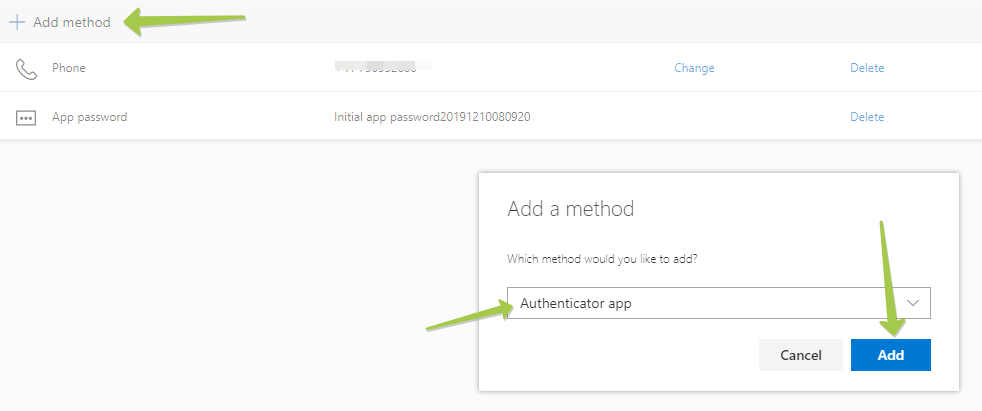
Click "Add" to proceed to the next step. By default, it prompts to use Microsoft Authenticator, which uses a different OTP protocol, which cannot be transferred over to our hardware tokens. Please click on "I want to use a different authenticator app" to generate a TOTP QR code instead.
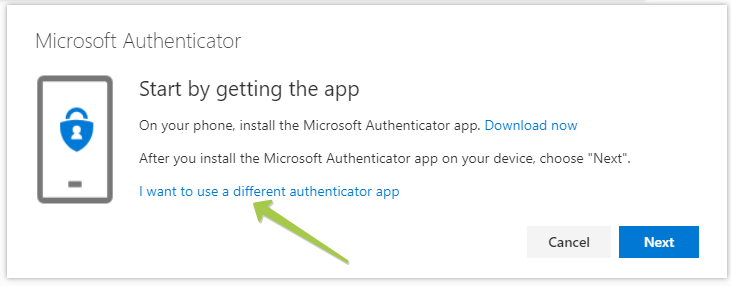
On the next window, click "Next" to get the QR code displayed on the screen
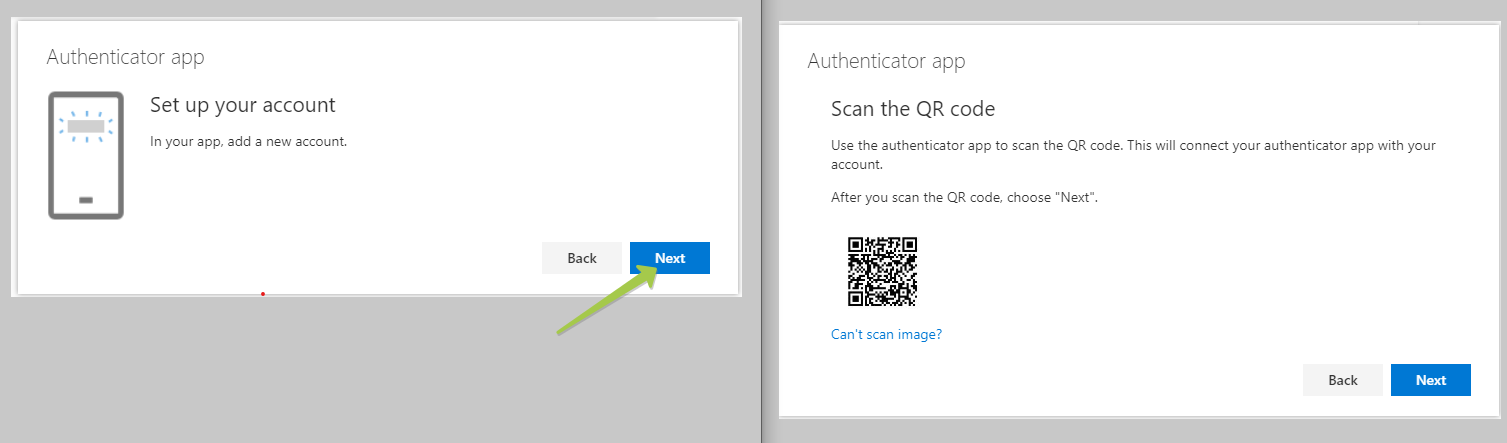
On the 'Scan the QR code' page, click the 'Can't scan image?' button and copy the secret key (which will be used in the next step)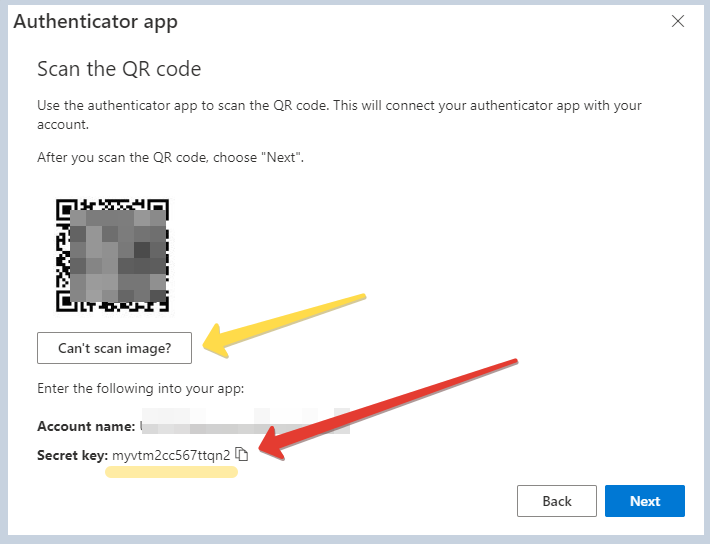
Keep this window open, we will complete the verification after the next step is done.
Step 2. Add the TOTP Secret to your FIDO2 Security key
Open the TOTP Authenticator app and click on "+" (Add account) button to open the TOTP Account creation form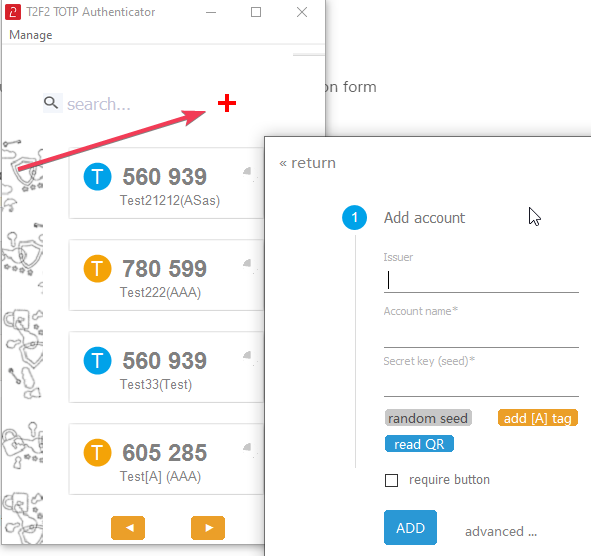
Fill the OTP Account creation form as described below:
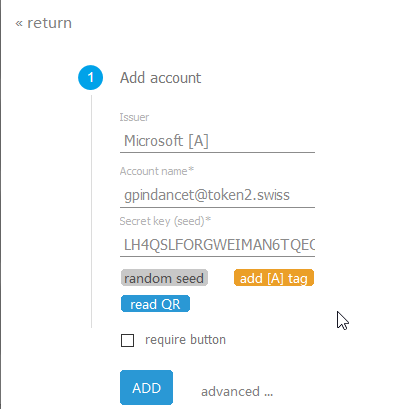
- Issuer : signifies the system this OTP will be used for. You can use "O365" for this field.
- Account name: put your username here
- Secret key : paste or type the secret key value retrieved in the previous step
Click on "ADD" button to complete adding the profile. The profile should appear in the list. 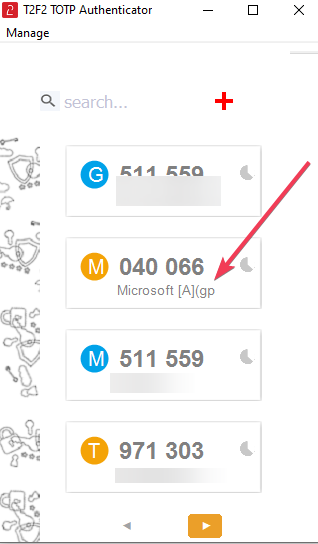
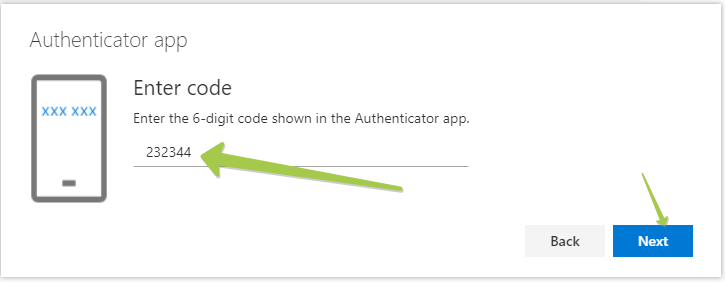
Now, we are ready to complete the MFA enrollment in our Office 365 account. To do so, go back to your security settings page (the one we left open in the previous step). To verify the OTP, click on Next button, and on the next window, you have to enter the OTP code displayed on the TOTP Profile.
FAQ
Q: Can I set a TOTP profile as autoOTP enabled?A: You can only set this parameter when creating the TOTP profile. For security reasons, the API does not allow modification of the TOTP slot settings
Q: Can I have more than on autoOTP enabled profile?
A: The tag ([A] string) is just a text appended to the profile name, so you technically can have more than one profile with this tag. However, only the last one will be used for the autoOTP feature (the list is sorted alphabetically).
Q: Why is the app requesting to be launched in Admin mode??
A: If the USB key has been configured to disable HID USB mode, access to TOTP data is only possible via the FIDO channel, which requires admin rights.
Download
You can download the T2F2 TOTP Authenticator below. The specifications are as follows:
Type: standalone exe (portable)
Size: 1.4MB
Admin rights required: No
Subscribe to our mailing list
Want to keep up-to-date with the latest Token2 news, projects and events? Join our mailing list!