
Using TOTPRadius with Barracuda CloudGen Firewall

The guide is based on the following components:
• Active Directory deployed on Windows Server 2016 (IP: 192.168.50.10)• Token2 TOTPRadius v0.2.6 with built-in free 5 users license(IP: 192.168.50.20)
• Classic or a programmable Token2 TOTP hardware token used as the second factor. TOTP compliant mobile apps can be used as well
• Barracuda CloudGen firewall APPLIANCE VF1000 (management interface IP:192.168.50.252)
TOTPRadius configuration
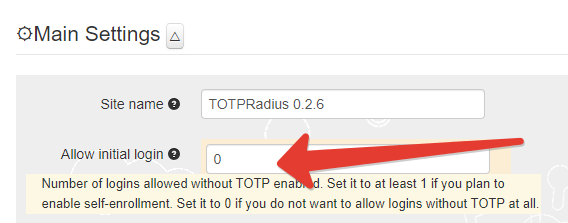
Once the TOTPRadius appliance has been installed and initialized, configure the following settings on the General settings page:► Set or generate a new Radius secret
► Set 'Allow initial login' value to zero
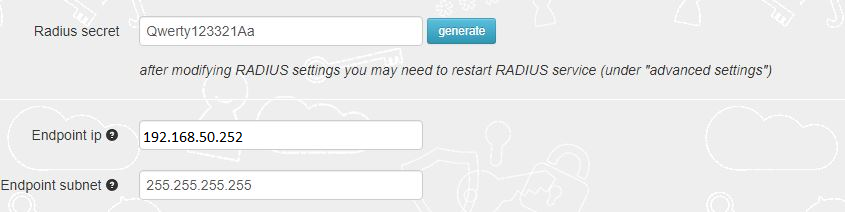
► [optional] In the Endpoint IP and subnet fields specify the parameters of your Barracuda CloudGen Firewall APPLIANCE VF1000 (192.168.50.252)
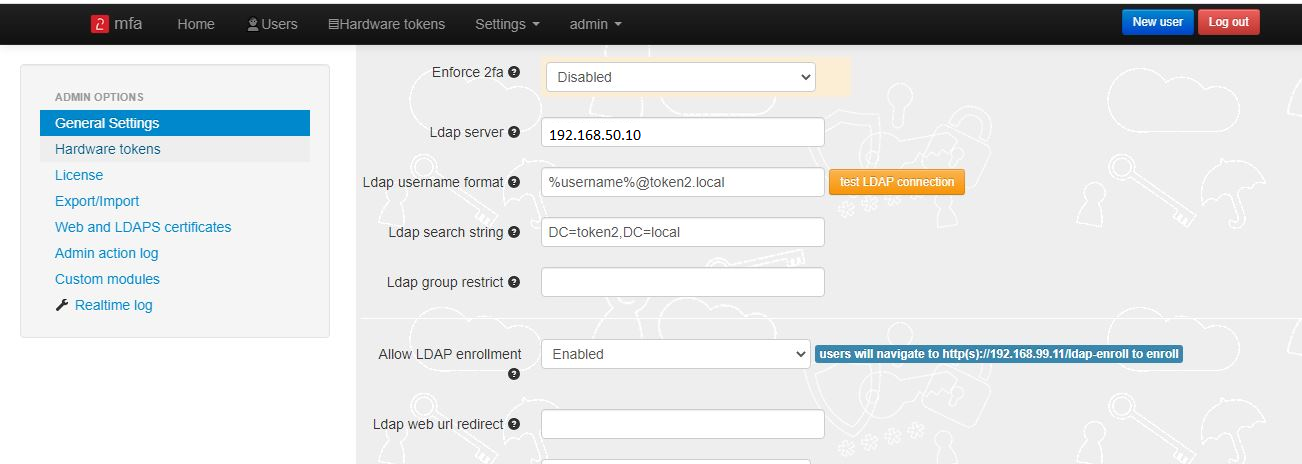
► Set LDAP as enabled
► Specify the LDAP server IP/FQDN (192.168.50.10) and the format of the username
(%username%@domain.local or DOMAIN\%username% format, where "DOMAIN" or "domain.local" need to be replaced with the domain name or removed if needed )
► If you decide to allow self-enrollment, make sure "Allow ldap enrollment" parameter is enabled.
In the same section, you can also allow re-enrollment and modify the intro text of the LDAP web enrollment page.
 >
>Generate or set the second factor for the user on the TOTPRadius appliance
Second factor for the user can be added in two ways:1) By self-enrollment. Users can enroll their hardware tokens themselves using link http://(totpradius server_ip)/ldap-enroll :
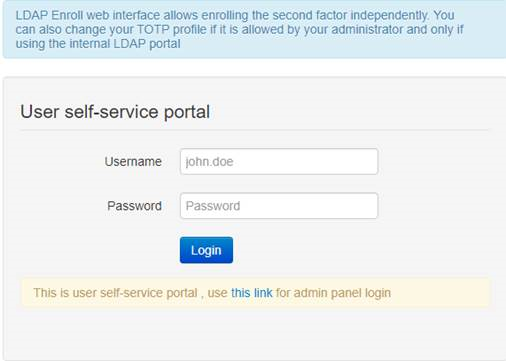
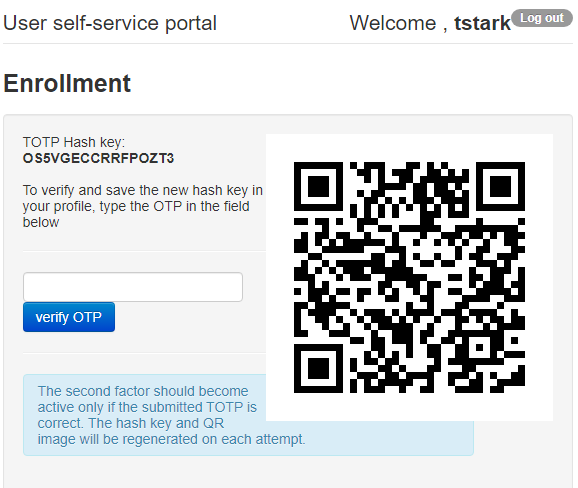
Self Enrollment is possible using any TOTP app (such as Google Authenticator or Microsoft Authenticator).If you wish
to use our programmable hardware, you can burn the secret onto the hardware token by scanning the QR code using one of the NFC Burner apps.
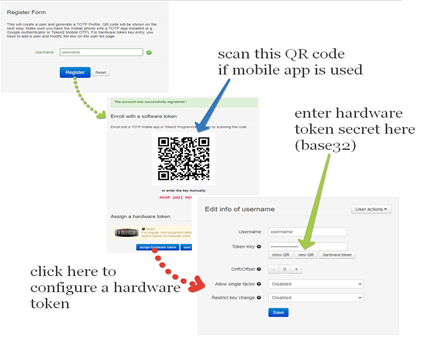
2) By TOTPRadius admin. Login to TOTPRadius admin interface, and click on New User:
Configure Barracuda CloudGen Firewall
Configure a RADIUS Server:To use RADIUS authentication with Barracuda CloudGen firewall, you must configure a RADIUS server (TOTPRadius) in Barracuda.
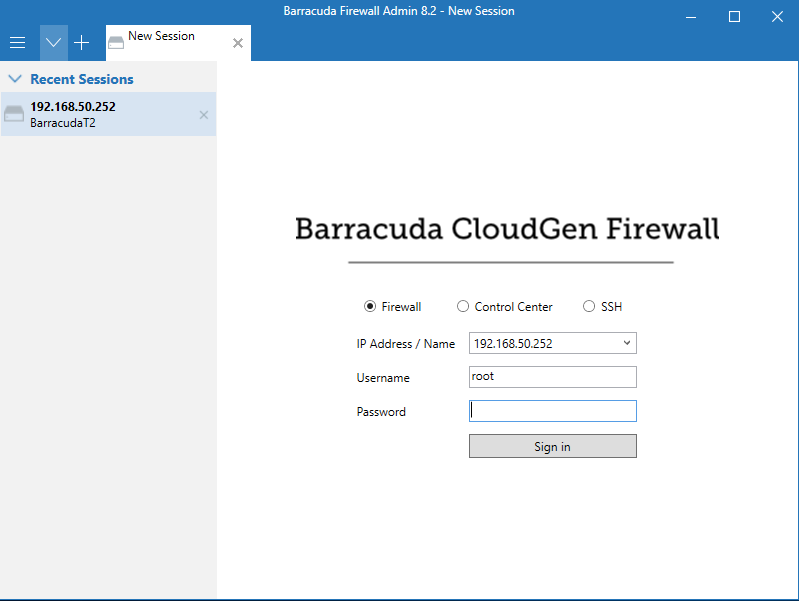
1. Log in to the Barracuda CloudGen firewall with Barracuda NextGen Admin:
 >
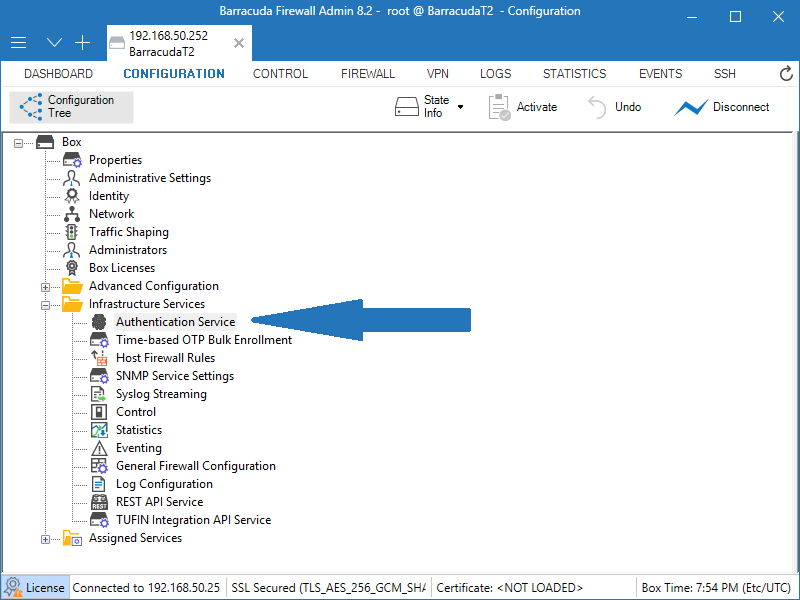
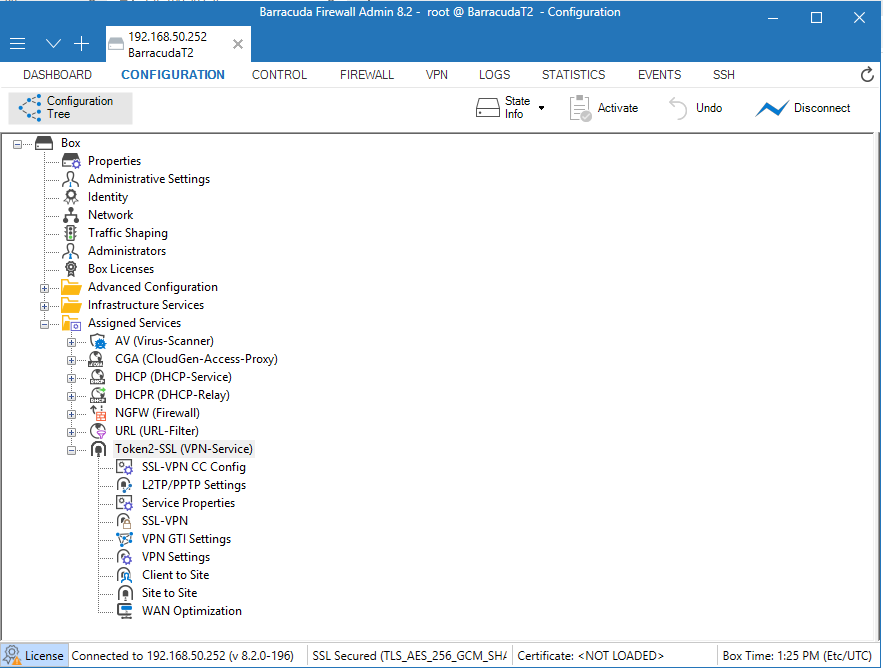
>2. Select Configuration > Configuration Tree > Box > Infrastructure Services > Authentication Service
3. From the navigation menu, select RADIUS Authentication.
4. Click Lock.
5. From the Configuration Mode section of the navigation menu, select Advanced View.
6. In the Radius Authentication section, from the Activate Scheme drop-down list, select Yes.
7. From the Method drop-down list, select RADIUS.
8. For Basic, click + to add a RADIUS server.
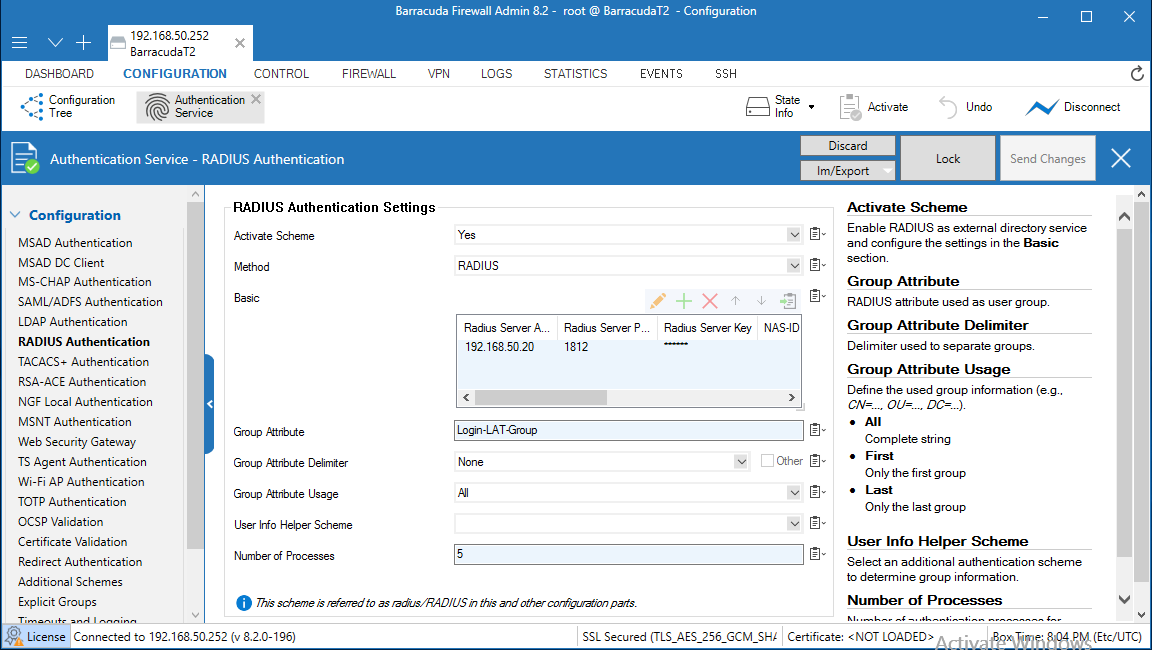
9. In the Radius Server Address text box, type the IP address of the TOTPRadius server (RADIUS server).
10. In the Radius Server Port text box, type the port number to use to communicate with the TOTPRadius (RADIUS server). The default port is 1812.
11. For Radius Server Key, type a shared secret key (password) that Barracuda and the TOTPRadius (RADIUS server) will use to communicate.
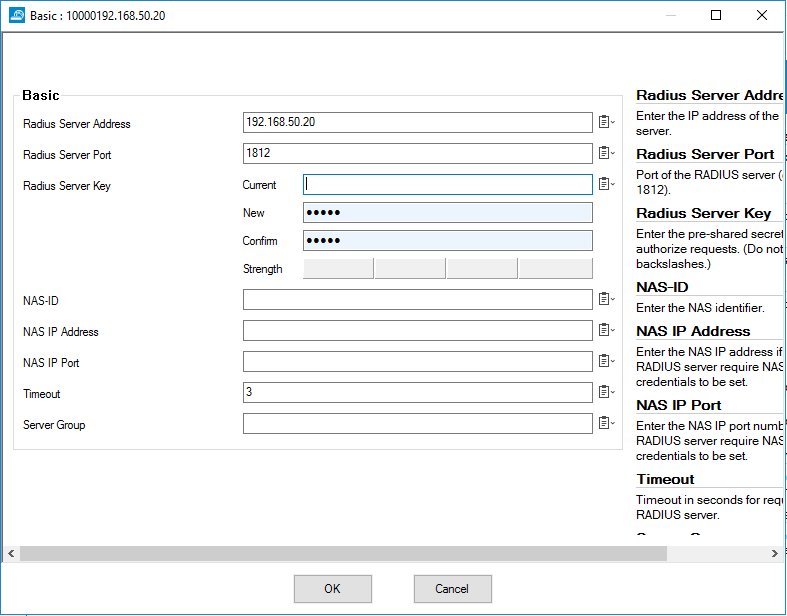 >
>12. Click OK. Leave the default value for other settings.
13. Click Send Changes.
14. Click Activation Pending.
Create an SSL VPN Server:
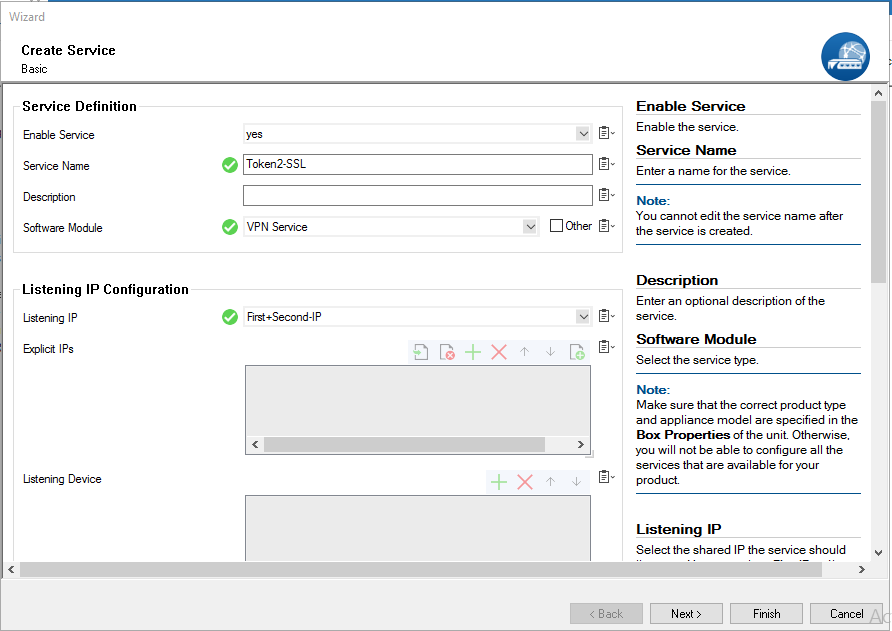
1. Select Configuration > Configuration Tree > Box > Assigned Services.2. Right-click Assigned Services and select Create Service.
3. From the Enable Service drop-down list, select Yes.
4. Type a Service Name. The service name must be unique and contain more than six characters. You cannot change the service name later.
5. From the Software Module drop-down list, select VPN Service.
6. From the Service Availability drop-down list, select First + Second-IP.
 >
>
7. Click Next.
8. Leave the default settings on the Statistics and Access Notification configuration pages.
10. Click Finish.
11. Click Activate.
 >
>
Disable Port 443 for Site-to-Site and Client-to-Site VPN
1. Select Configuration > Configuration Tree > Box > Assigned Services > VPN-Service > VPN Settings.2. Click Lock.
3. Click Click here for Server Settings.
The Server Settings window appears.
4. For Listen on port 443 ,uncheck it.
 >
>
Configure SSL VPN Server Settings
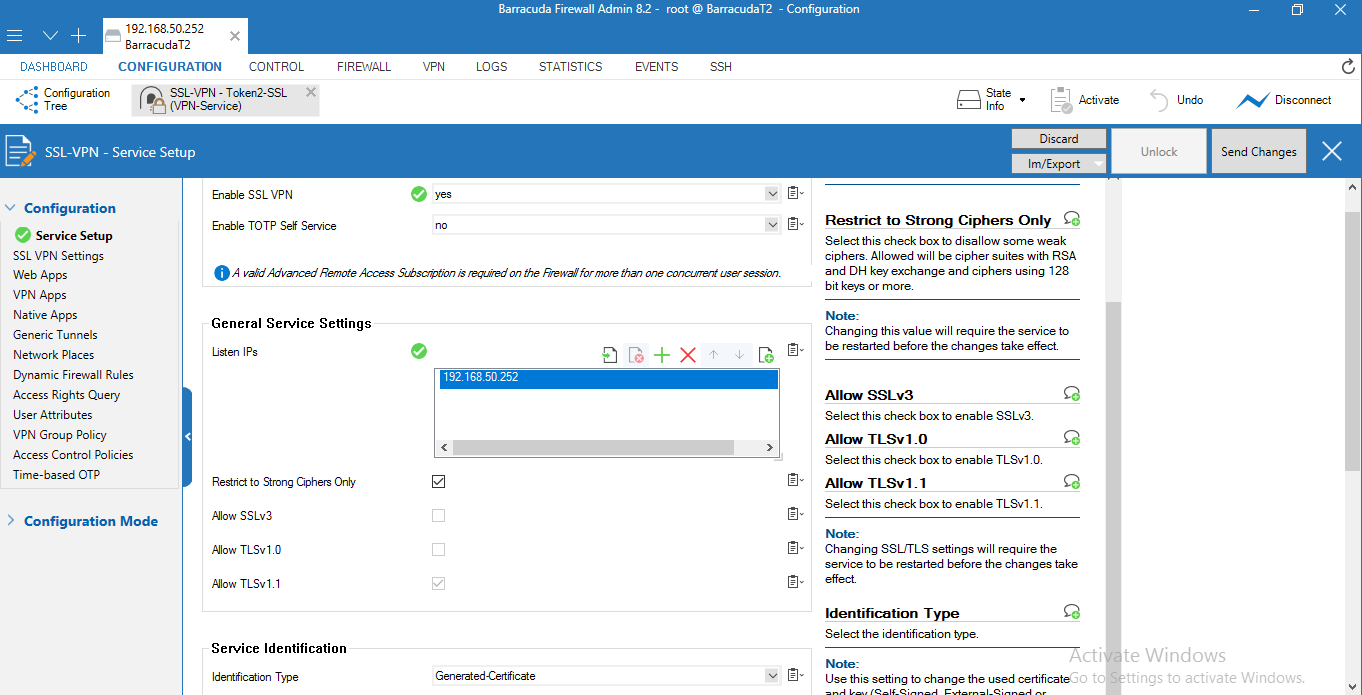
1. Select Configuration > Configuration Tree > Box > Assigned Services > VPN-Service > SSL-VPN.2. From the Enable SSL VPN drop-down list, select Yes.
3. Next to Listen IPs, click +. This is the external IP address that the SSL VPN listens on
(usually the IP address used to connect to the Internet, in this guide we use local ip(192.168.50.252)).
4. Select the Restrict to Strong Ciphers Only check box.
5. From the Identification Type drop-down list, select Generated-Certificate.
 >
>
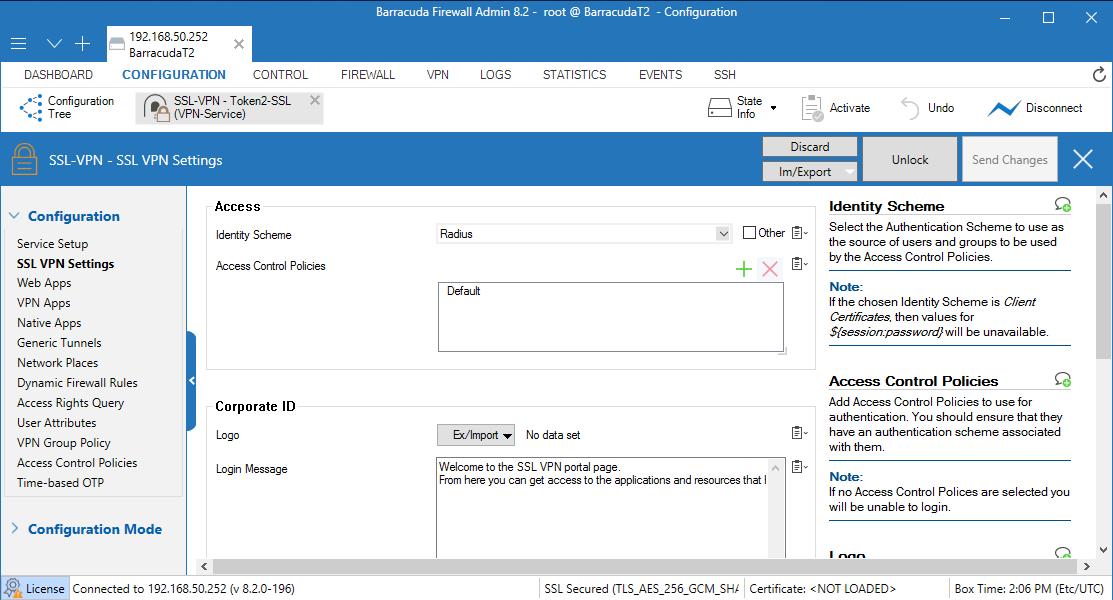
7. From the navigation menu, select SSL VPN Settings.
8. From the Identity Scheme drop-down list, select RADIUS.
 >
>
9. Click Send Changes.
10. Click Activate.
11. From the navigation menu, select Access Control Policies.
12. Edit the Default policy.
13. Next to Authentication Schemes, click + and add RADIUS.
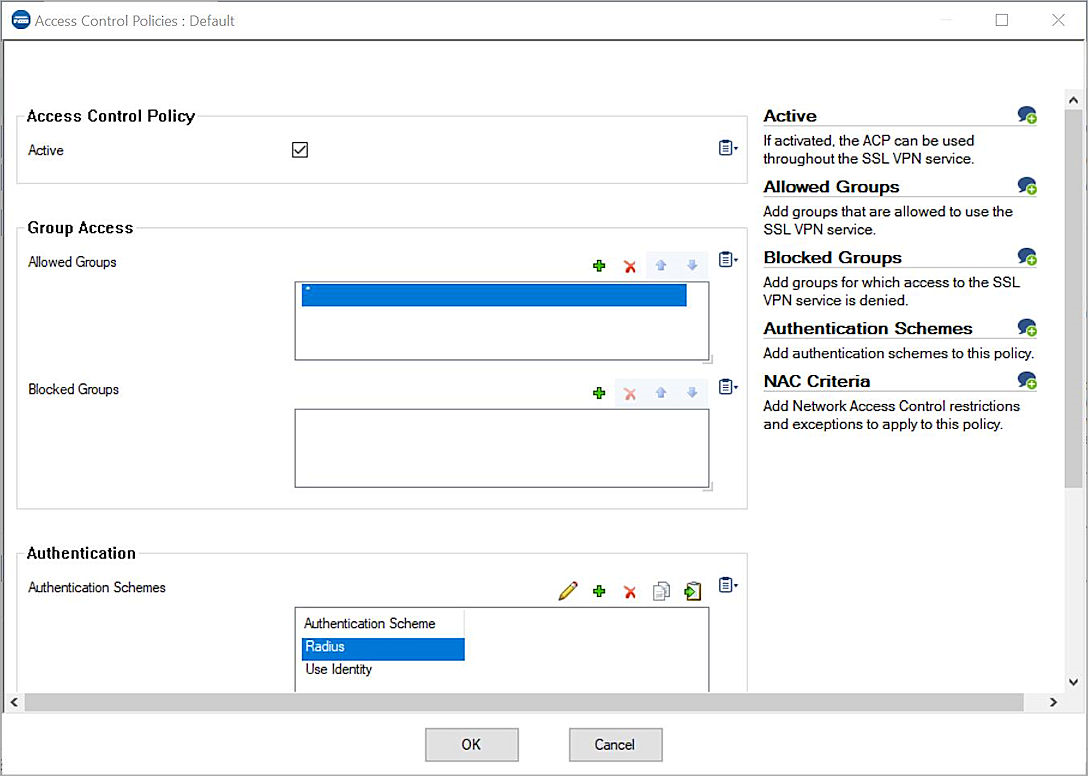 >
>14. Click OK.
15. Click Send Changes.
16. Click Activate.
Test the Integration
In this example, we show the one-time password authentication method.1. Log in to the Barracuda CloudGen firewall with Barracuda NextGen Admin.
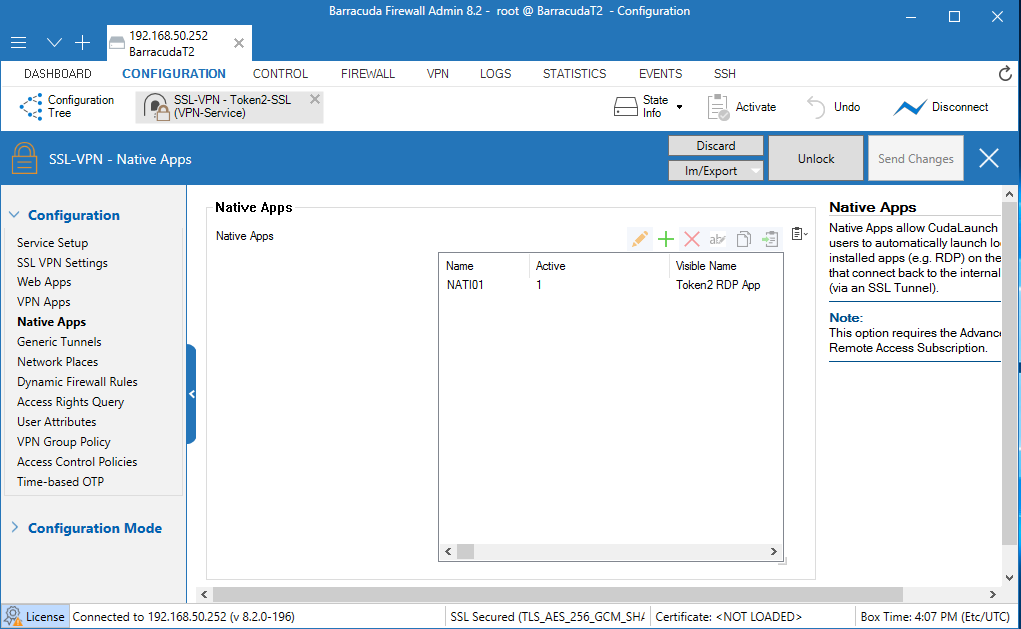
2. Select Configuration > Configuration Tree > Box > Assigned Services > VPN-Service > SSL-VPN > Native Apps.
3. Next to Native Apps, click + and add an RDP App.
 >
>4. Run the CudaLaunch client application. You can download this application from the Barracuda NG Download Portal.
5. Type the IP address(192.168.50.252) of the Barracuda CloudGen firewall.
6. Click Connect.
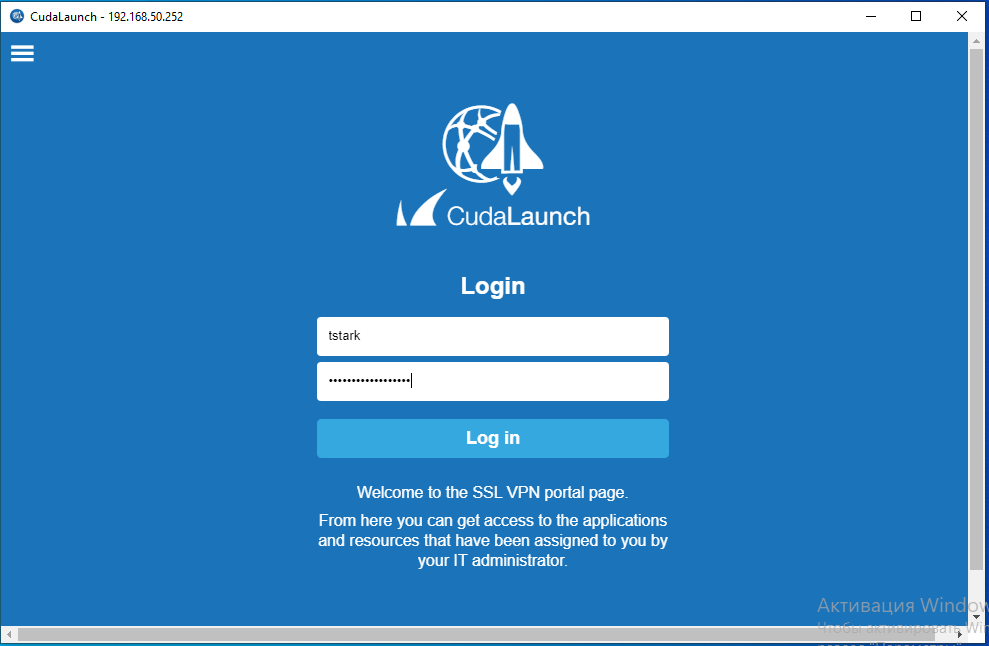 >
>7. In the Server certificate error dialog box, click Yes.
8. In the Username text box, type your AD user name.
9. In the RADIUS Password text box, type your AD User’s password and the OTP shown
for your token ,enrolled in TOTPRadius. Do not add a space between your password and your OTP.
Example: If your AD User’s password is Password and your OTP is 123 789, then you type Password123789.
10. Click Log in.
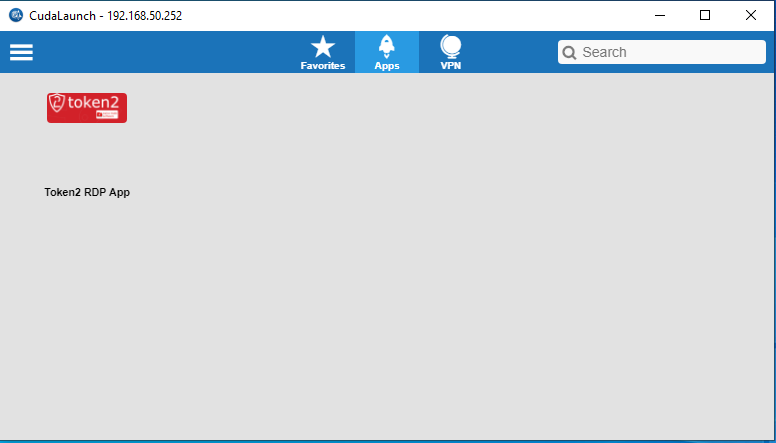 >
>11. Click Token2 RDP App to run this app.
About
Installation and configuration
- Installation and initial configuration
- Network configuration
- Migrating from older versions
- LDAP Configuration
- Azure AD Configuration
- Self-service enrollment portal
- Web and LDAPS Certificates
- Syslog configuration
- Single-factor authentication exceptions
- Slave appliance mode
- Dynamic RADIUS Attributes
Integration guides
Blog
05-03-2026
Introducing TOTPVault — self-hosted TOTP management for teams
 Most TOTP apps work by distributing copies of the secret to every person who needs access — fine for personal accounts, but for shared service accounts it means MFA secrets scattered across people's phones with no clean way to revoke access when someone leaves.
21-12-2025
Android, NFC, and the Missing Piece of WebAuthn
 For years, Android users have faced a frustrating limitation—Android does not support CTAP2 over NFC. This means no PIN verification and no discoverable credentials (passkeys) when using NFC, and therefore limited to simple U2F-style flows without user verification. That said, there finally seems to be a solution.
19-12-2025
Streamline Token2 Classic Tokens in Okta
 Token2 classic hardware tokens provide phishing-resistant multi-factor authentication for your Okta environment. Our updated integration guide shows you how to deploy them using Okta's Custom OTP authenticator method.