
Using Token2 hardware tokens for Authelia IAM
 Authelia is an open-source authentication and authorization server and portal that fulfills the identity and access management (IAM) role of information security
by providing multi-factor authentication and single sign-on (SSO) for your applications via a web portal. It acts as a companion for common reverse proxies like
nginx, Traefik, caddy or HAProxy to let them know whether requests should either be allowed or redirected to Authelia's portal for authentication.
Authelia is an open-source authentication and authorization server and portal that fulfills the identity and access management (IAM) role of information security
by providing multi-factor authentication and single sign-on (SSO) for your applications via a web portal. It acts as a companion for common reverse proxies like
nginx, Traefik, caddy or HAProxy to let them know whether requests should either be allowed or redirected to Authelia's portal for authentication.For this guide, we chose to use Nginx Proxy Manager as reverse proxy software. The Nginx proxy manager (NPM) is a reverse proxy management system running on Docker. NPM is based on an Nginx server and provides users with a clean, efficient, and beautiful web interface for easier management.
The guide assumes that you have already had a working instance of Authelia, and we will show the procedures required to configure the TOTP 2FA method for it.
Authelia allows using Token2 programmable tokens (as a replacement for the Authenticator App) for two-step verification.
Requirements:
• A Server with Docker, Docker-Compose,Nginx Proxy Manager , and Authelia Installed and Ready• A FQDN address domain/ Sub-domain you want to use for your Authelia portal (e.g. auth.example.com)
• An A-record pointing to the Public IP address where your server is.
• A Token2 programmable token
• An iPhone or Android device with NFC* - this is needed for the enrollment only, subsequent logins will only require the hardware token
[* Android and Windows versions are available for all models, but this guide will use the iPhone app as an example. iPhone apps are compatible with "-i" models only]
Step 1. Enable an MFA method
The Settings for Authelia can be set using the files below:authelia/config/configuration.yml
authelia/config/users_database.yml
The Users Database file settings
Create a user database that contains the users who want to access your services. Run "nano users_database.yml" inside the config folder: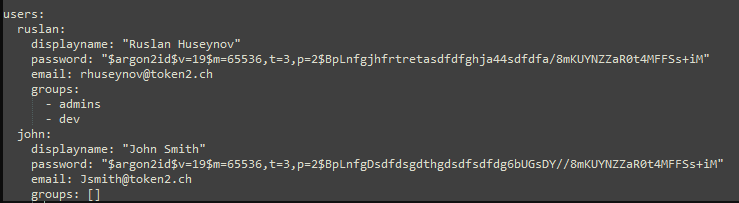
To create a hash password, use the command below:
docker run authelia/authelia:latest authelia hash-password 'yourpassword'
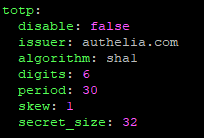
The Configuration file settings
For activating the TOTP 2Fa method and assigning it, you need to have some values in the configuration.yml file. Run the "nano configuration.yml" command from the terminal and add the values below:1)Activate the TOTP method.
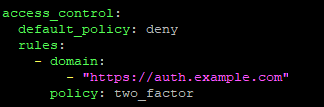
2)We will deny access to everyone and turn on 2FA authentication for the Authelia web portal (auth.example.com).
You also need to pay additional attention to the SMTP settings in this file. SMTP relay should work without any issues; otherwise, you will not be able to use 2FA methods.
Run "docker restart authelia" to restart the container with new settings.
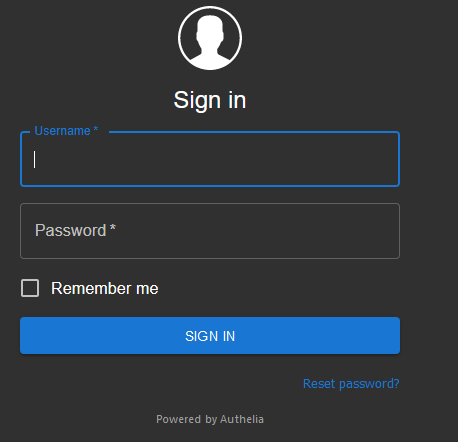
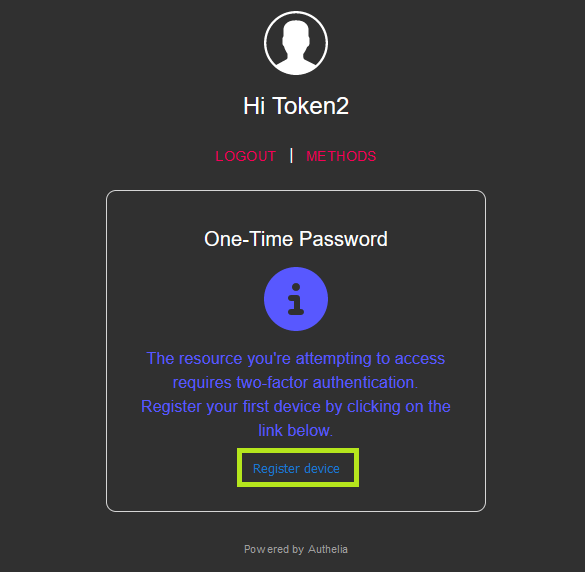
Now go to the https://auth.example.com web portal. You should be prompted to login. You can now enter your username and password and make sure you're able to login.
Click the "Register Device" button.
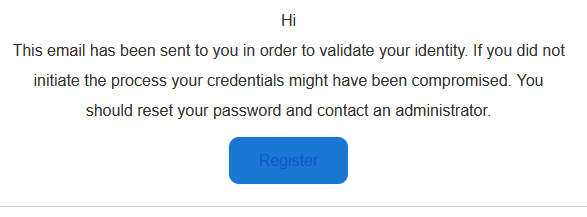
An email will be sent to your address to complete the process. Open your email from the same browser you were authorized to https://auth.example.com. Click on the "Register" button.
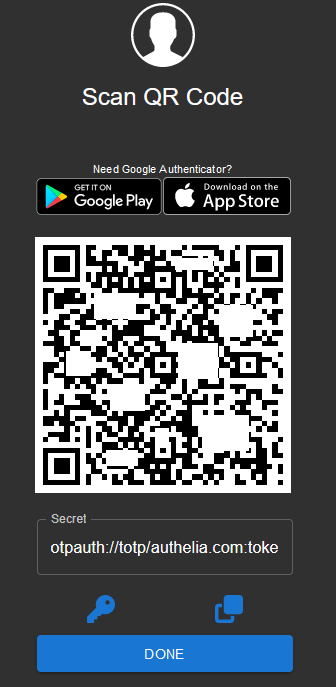
You will be prompted with a QR code that you will scan using one of the provisioning tools in the next step.
Step 2. Provision the token
- Launch the NFC burner app on your Android device and hit the "QR" button

- Point the camera to the QR code shown on the account page. Upon a successful QR scan, the camera window should disappear
- Turn on the token and touch it with your phone (make sure it is overlapped by the NFC antenna) and click "Connect" on the app
- Upon successful connection, click the "Burn seed" button (the button will become active only if NFC link is established).
- A message box similar to the one below will be shown upon successful completion
Follow the steps below to perform setting the seed for your token using Windows App.
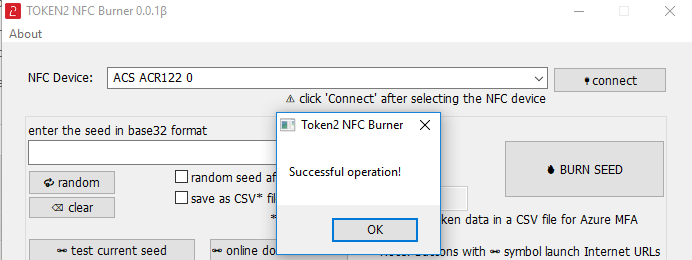
1. Launch the exe file, then select the NFC device from the drop-down list and click on "Connect". You should see a message box notifying about a successful operation.
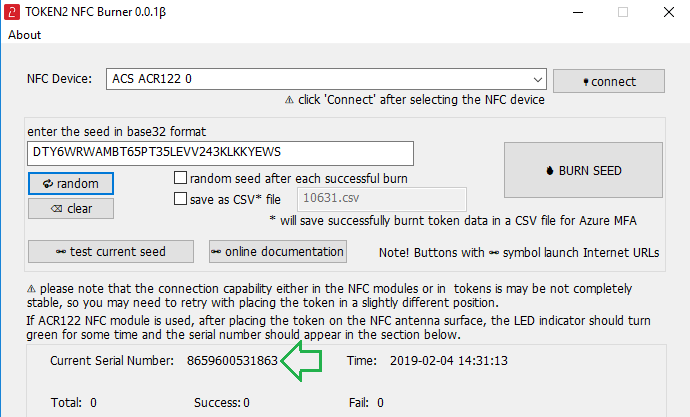
2. Enter or paste the seed in base32 format, or use one of the QR scanning methods to populate this field
3. Place the token onto the NFC module and wait for its serial number to appear.
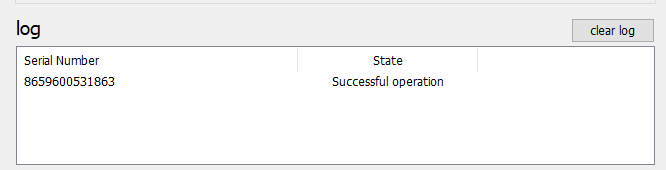
4. Click on "Burn seed" button. A log entry with the serial number and "Successful operation" text will be logged in the log window.
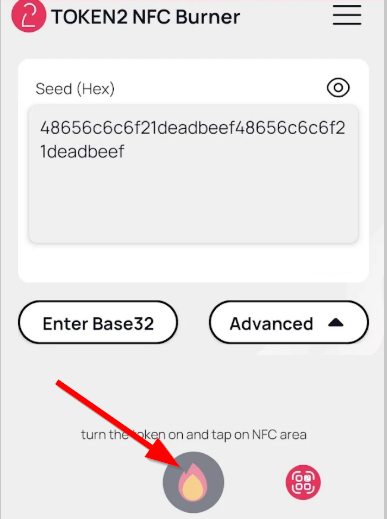
- Launch the NFC burner app on your iPhone device and hit the "scan QR" button
- Point the camera to the QR code shown on the account page. Upon a successful QR scan, the camera window should disappear and the seed field will be populated with the hex value of the seed. Touch the Burn button to continue.
- When an NFC prompt similar to the one below is shown, turn on the token and touch the top of your iPhone with the token.
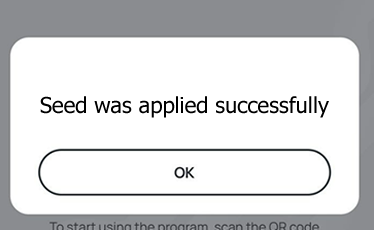
- A message box similar to the one below will be shown upon successful completion
Please note that the procedures above are shown only as examples and are valid to single profile TOTP tokens only. The procedure for multi-profile and USB-programmable devices are similar but slightly different
Step 3. Verify the OTP
After the token provisioning is done, turn the token off and back on. Click the "Done" button, enter the OTP generated by the hardware token.
After the code is verified, you will be notified that you are authenticated.
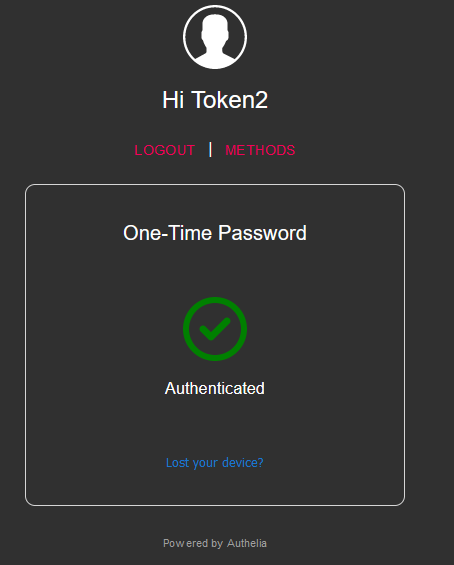
Then you will be redirected to your resources.
Subscribe to our mailing list
Want to keep up-to-date with the latest Token2 news, projects and events? Join our mailing list!