
Using Token2 Programmable TOTP tokens with Silverfort
 Silverfort provides a unified identity protection platform that consolidates security controls across corporate networks and cloud environments to block identity-based attacks.
Using agentless and proxyless technology, Silverfort seamlessly integrates with all existing IAM solutions (such as AD, ADFS, RADIUS, Azure AD (Microsoft Entra ID), Okta, Ping, AWS IAM, etc.),
extending their coverage to assets such as homegrown and legacy applications, IT infrastructure, file systems, command-line tools, machine-to-machine access, and more.
Silverfort provides a unified identity protection platform that consolidates security controls across corporate networks and cloud environments to block identity-based attacks.
Using agentless and proxyless technology, Silverfort seamlessly integrates with all existing IAM solutions (such as AD, ADFS, RADIUS, Azure AD (Microsoft Entra ID), Okta, Ping, AWS IAM, etc.),
extending their coverage to assets such as homegrown and legacy applications, IT infrastructure, file systems, command-line tools, machine-to-machine access, and more.Silverfort supports the use of Token2 programmable tokens for two-step verification for protected users to approve MFA requests(as a replacement for the authenticator application). When the token is registered with Silverfort, the user can use the token to approve an MFA request sent by Silverfort.
In this guide, we will show how to use Token2 programmable tokens for two-factor authentication with Silverfort.
Requirements:
• Access to the Silverfort admin console.• A Token2 programmable token.
• An iPhone or Android device with NFC*.
[* Android and Windows versions are available for all models, but this guide will use the iPhone app as an example. iPhone apps are compatible with "-i" models only].
Step 1. Enable an MFA method
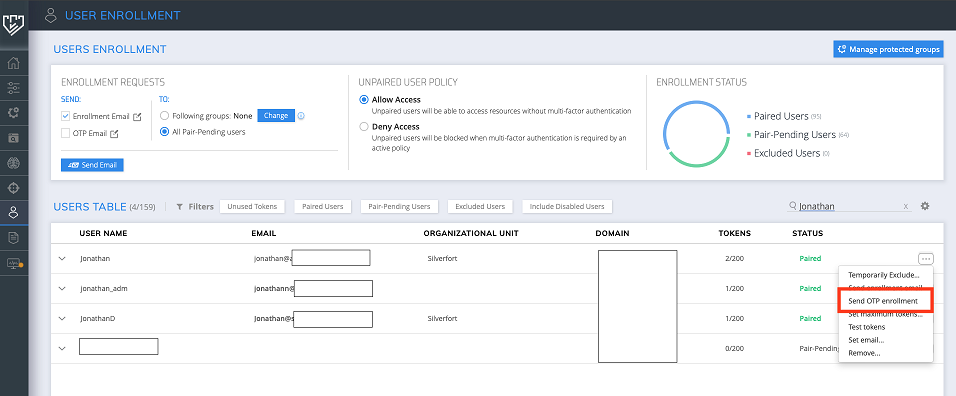
1. Open the User Enrollment Tab, then choose Manage Protected Groups.2. Choose groups that are filled with users that want to enroll with OTP, then click done.
3. Then click the [...] button on the right side and click "Send OTP Enrollment".
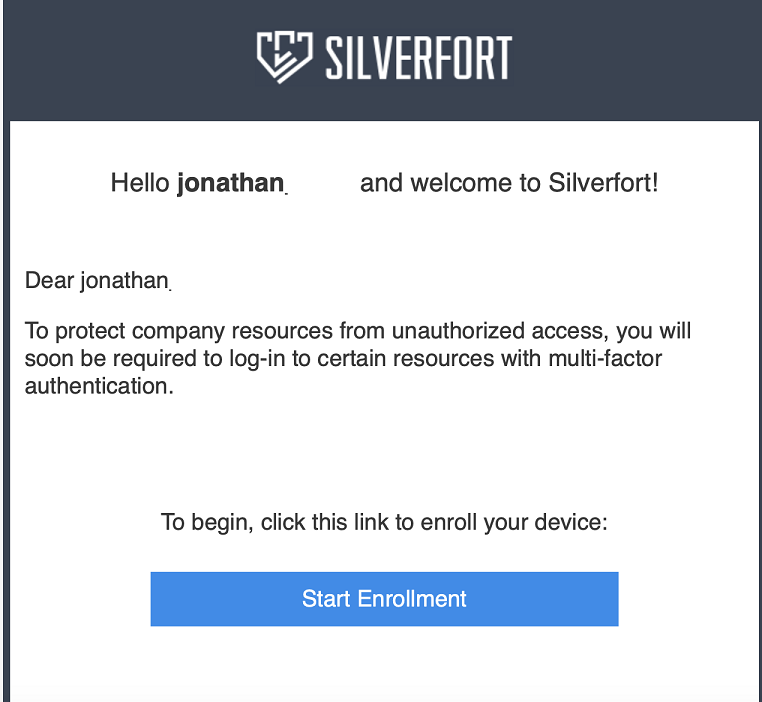
4. Another window will appear. Click the "Start Enrollment" button.
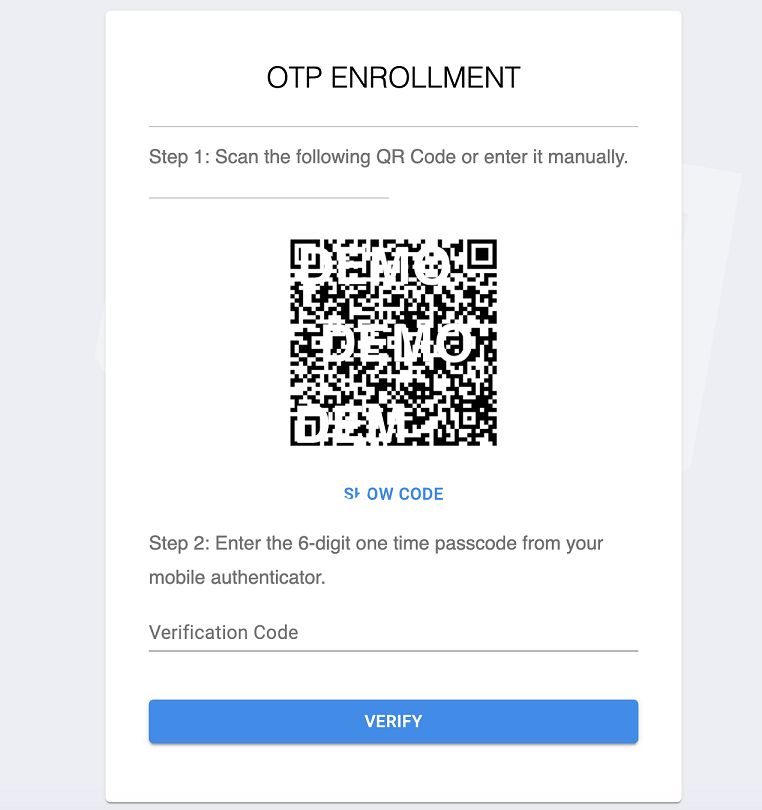
5. Then you will be redirected to the OTP enrollment page, which contains a QR code that you will scan using one of the provisioning tools in the next step.
Step 2. Provision the token
- Launch the NFC burner app on your Android device and hit the "QR" button

- Point the camera to the QR code shown on the account page. Upon a successful QR scan, the camera window should disappear
- Turn on the token and touch it with your phone (make sure it is overlapped by the NFC antenna) and click "Connect" on the app
- Upon successful connection, click the "Burn seed" button (the button will become active only if NFC link is established).
- A message box similar to the one below will be shown upon successful completion
Follow the steps below to perform setting the seed for your token using Windows App.
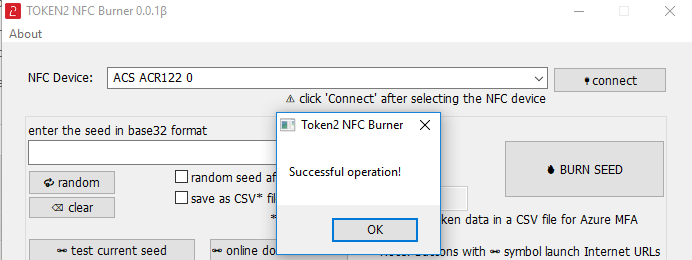
1. Launch the exe file, then select the NFC device from the drop-down list and click on "Connect". You should see a message box notifying about a successful operation.
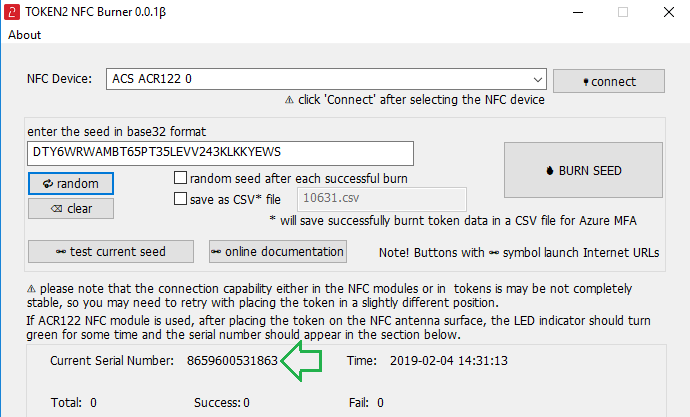
2. Enter or paste the seed in base32 format, or use one of the QR scanning methods to populate this field
3. Place the token onto the NFC module and wait for its serial number to appear.
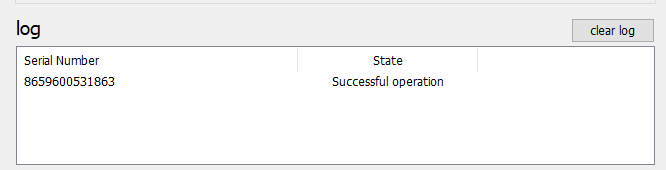
4. Click on "Burn seed" button. A log entry with the serial number and "Successful operation" text will be logged in the log window.
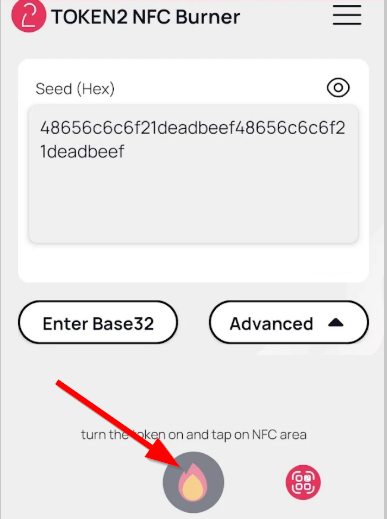
- Launch the NFC burner app on your iPhone device and hit the "scan QR" button
- Point the camera to the QR code shown on the account page. Upon a successful QR scan, the camera window should disappear and the seed field will be populated with the hex value of the seed. Touch the Burn button to continue.
- When an NFC prompt similar to the one below is shown, turn on the token and touch the top of your iPhone with the token.
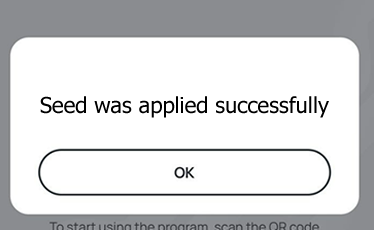
- A message box similar to the one below will be shown upon successful completion
Step 3. Connect using 2FA
After the token provisioning is done, turn the token off and back on. Add the OTP generated by the hardware token to the "Verification code" value and click "VERIFY".
Now you have successfully enabled the Token2 programmable token with an authentication (MFA) protection layer for login.
Key Benefits
Extend Token2 FIDO2 MFA Everywhere
Secure access to all resources, on-prem or in the cloud, including those that could not be protected until now.
Advanced Risk Analysis
Evaluate the risk of each access attempt based on the user’s full context.
Real-Time Protection
Detect and prevent advanced identity-based attacks across your entire environment.
Consistent User Experience
Provide users with a single MFA solution when requesting access to any resource, on-prem or on the cloud.
No MFA Fatigue
Ensure users are required to respond to an MFA only when Silverfort’s risk engine detects irregular activity
visit silverfort.com for more information
Subscribe to our mailing list
Want to keep up-to-date with the latest Token2 news, projects and events? Join our mailing list!